显然,如果将抗锯齿设置为 true,则 imagesetthickness 无法正常工作。imagesetthickness
(PHP 4 >= 4.0.6, PHP 5, PHP 7, PHP 8)
imagesetthickness — 设置线条绘制的粗细
描述
imagesetthickness() 将绘制矩形、多边形、弧线等时使用的线条粗细设置为 thickness 像素。
范例
示例 #1 imagesetthickness() 示例
<?php
// 创建一个 200x100 的图像
$im = imagecreatetruecolor(200, 100);
$white = imagecolorallocate($im, 0xFF, 0xFF, 0xFF);
$black = imagecolorallocate($im, 0x00, 0x00, 0x00);

// 将背景设置为白色
imagefilledrectangle($im, 0, 0, 299, 99, $white);

// 将线条粗细设置为 5
imagesetthickness($im, 5);

// 绘制矩形
imagerectangle($im, 14, 14, 185, 85, $black);

// 将图像输出到浏览器
header('Content-Type: image/png');

imagepng($im);
imagedestroy($im);
?>
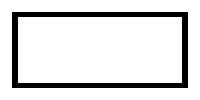
以上示例将输出类似于以下内容

+添加注释
用户贡献的注释 9 条注释
azinkey at gmail dot com 
11 年前
感谢 circle14,

只需更改该行即可解决我们对椭圆的需求

while ($line < $thickness) {
$line++;
$elipse_w--;
imageellipse($image, $pos_x, $pos_y, $elipse_w, $elipse_h, $color);
$elipse_h--;
    }
fred at nowhere dot fr 
15 年前
更糟糕的一件事是,imagesetthikness() 对您绘制的下一个对象起作用。
例如:您可以使用粗细为 1 的线条绘制网格

通过调用 imagesetthickness($image, 1);

… 绘制网格的脚本…

然后使用粗细为 3 的线条绘制图形线条,调用 imagesetthikness
imagesetthickness($image, 3);
… 绘制图形线条的脚本…

希望这有帮助…
jean-raymond dot chauviere at gmail dot com 
15 年前
一种更容易管理的粗细是,在绘制椭圆之前,使用两种不同颜色的椭圆来进行调整


<?php
 imagefilledellipse ($this->image,60,42,57,57,$drawColor);
 imagefilledellipse ($this->image,60,42,45,45,$backColor);
?>

第一行使用所需的颜色绘制一个填充的椭圆,第二行从相同的中心绘制一个较小的背景色椭圆。


此方法的缺点是您擦除了椭圆中间的所有内容。
gmail.com@mspreij 
8 年前
如您在示例图像中看到的,左右两侧比应有的宽度宽 1 像素,对于任何宽度 > 1 的情况都是如此。
编写了此函数来修复该部分.. 可能不是直接替换。它针对给定的坐标绘制一个矩形,用于任何宽度线。

<?php
// 在给定坐标周围绘制一条宽度为 $width 的线,请记住 0,0,1,1 会产生一个 2×2 的正方形
function imagelinerectangle($img, $x1, $y1, $x2, $y2, $color, $width=1) {
 imagefilledrectangle($img, $x1-$width, $y1-$width, $x2+$width, $y1-1, $color);
 imagefilledrectangle($img, $x2+1, $y1-$width, $x2+$width, $y2+$width, $color);
 imagefilledrectangle($img, $x1-$width, $y2+1, $x2+$width, $y2+$width, $color);
 imagefilledrectangle($img, $x1-$width, $y1-$width, $x1-1, $y2+$width, $color);
}
?>
admin at circle14 dot net 
15 年前
这是一个我编写的自定义函数,用于解决椭圆的线宽问题。


<?php
function draw_oval ($image, $pos_x, $pos_y, $elipse_width, $elipse_height, $color, $px_thick) {
 $line = 0;
 $thickness = $px_thick;
 $elipse_w = $elipse_width;
 $elipse_h = $elipse_height;
 while ($line < $thickness) {
 imageellipse($image, $pos_x, $pos_y, $elipse_w, $elipse_h, $color);
 $line++;
 $elipse_w--;
 $elipse_h--;
 }
}
?>

希望您觉得这个有用。
baldurien at bbnwn dot eu 
16 年前
imagerectangle() 函数与 imagesetthickness 函数的配合方式有点奇怪。

<?php
imagesetthickness(1);
imagerectangle($im, 10, 10, 50, 50, $red);
?>

这将绘制一个 41x41 的正方形(因为 gd 需要包含右下角像素。50 应该替换为 49)。这将“类似于”

<?php
imageline($im, 10, 10, 10, 50, $red);
imageline($im, 10, 10, 50, 10, $red);
imageline($im, 50, 10, 50, 50, $red);
imageline($im, 10, 50, 50, 50, $red);
?>

第二个例子

<?php
imagesetthickness(2);
imagerectangle($im, 10, 10, 50, 50, $red);
?>

这将绘制一个 43x43 的正方形,因为边框(粗细)设置为 2。*但是*这不是围绕原始 41x41 正方形的 2 像素的“常规”边框!

在左右两侧,粗细将为 3,而在上下两侧粗细将为 2。

如果采用 imageline 示例,但在之前将粗细设置为 2,这将*几乎*奏效:正方形最左边的像素将不会绘制。

总结

1) 不要忘记绘制的矩形的(宽度,高度)是(x2-x1+1,y2-y1+1)
2) 矩形上的粗细实现不佳(或者至少行为没有记录),因为左右粗细不是想要的。
3) 4*imageline() 应该可以解决问题,但在“修补”左上角像素之后。