如果您不想创建(或搜索)全屏抗锯齿函数。
您可以作弊(实际上这是一个有点脏的低效技巧!!)
并通过使用“imagecopyresampled”对图像执行伪抗锯齿……
首先创建比您真正想要的尺寸大两倍的源图像。
然后使用“imagecopyresampled”将其缩小到原来的一半大小,该函数
会自动插值像素以创建抗锯齿效果!
我在饼图函数中使用了它,效果非常好,
并不像我想象的那么慢!
下面的粗略代码应该能让您了解……
<?php
$realWidth = 500;
$realHeight = 500;
$srcWidth = $realWidth * 2;
$srcHeight = $realHeight * 2;
// 创建更大的源图像
$srcImage = imagecreatetruecolor($srcWidth,$srcHeight);
// 创建实际/最终图像
$destImage = imagecreatetruecolor($realWidth,$realHeight);
// 现在执行您想在源图像中绘制的任何操作
// ...
// 图片完成,开始缩小...
imagecopyresampled($destImage,$srcImage,0,0,0,0,
$realWidth,$realHeight,$srcWidth,$srcHeight);
// 现在只需对 '$destImage' 执行任何操作(例如,显示或输出到文件!)
?>imageantialias
(PHP 4 >= 4.3.2, PHP 5, PHP 7, PHP 8)
imageantialias — 是否使用抗锯齿函数
描述
激活用于线条和线框多边形的快速绘制抗锯齿方法。它不支持 alpha 分量。它使用直接混合操作工作。它仅适用于真彩色图像。
不支持粗细和样式。
使用具有透明背景颜色的抗锯齿图元可能会导致一些意外的结果。混合方法将背景颜色用作任何其他颜色。缺乏 alpha 分量支持不允许基于 alpha 的抗锯齿方法。
变更日志
| 版本 | 描述 |
|---|---|
| 8.0.0 |
image 现在需要一个 GdImage 实例;以前,需要一个有效的 gd resource。 |
| 7.2.0 | imageantialias() 现在普遍可用。以前,只有在使用捆绑版本的 GD 库编译 PHP 时才可用。 |
示例
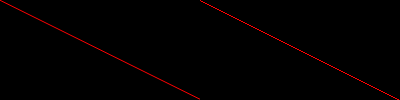
示例 #1 两条线的比较,一条启用抗锯齿
<?php
// 创建一个抗锯齿图像和一个普通图像
$aa = imagecreatetruecolor(400, 100);
$normal = imagecreatetruecolor(200, 100);

// 为一个图像启用抗锯齿
imageantialias($aa, true);

// 分配颜色
$red = imagecolorallocate($normal, 255, 0, 0);
$red_aa = imagecolorallocate($aa, 255, 0, 0);

// 绘制两条线,一条启用 AA
imageline($normal, 0, 0, 200, 100, $red);
imageline($aa, 0, 0, 200, 100, $red_aa);

// 合并两个图像,并排输出 (AA:左,普通:右)
imagecopymerge($aa, $normal, 200, 0, 0, 0, 200, 100, 100);

// 输出图像
header('Content-type: image/png');

imagepng($aa);
imagedestroy($aa);
imagedestroy($normal);
?>
以上示例将输出类似于以下内容的结果
参见
- imagecreatetruecolor() - 创建一个新的真彩色图像
+添加注释
用户贡献注释 8 条注释
padigan 
17 年前
trimbo 
19年前
到目前为止,使用PHP 5.0.4,我已经成功地使Imageantialias()与以下函数一起工作:
ImageLine()
ImagePolygon()

但是不能与以下函数一起工作:
ImageArc()
ImageEllipse()
ImageFilled*()

您仍然可以通过在具有相同尺寸的填充多边形上绘制空心多边形来绘制抗锯齿填充多边形。
<?php
 $points=array($x,$y, $x2,$y2, $x3,$y3);
 imageFilledPolygon($im, $points, 3, $gray );
 imagePolygon($im, $points, 3, $gray );
?>
n-dream at gmx dot ch 
18年前
以下函数绘制抗锯齿(未填充)椭圆。
使用方法与普通的ImageEllipse函数相同。
可选参数设置线段数……

function ImageEllipseAA( &$img, $x, $y, $w, $h,$color,$segments=70)
{
$w=$w/2;
$h=$h/2;
$jump=2*M_PI/$segments;
$oldx=$x+sin(-$jump)*$w;
$oldy=$y+cos(-$jump)*$h;
for($i=0;$i<2*(M_PI);$i+=$jump)
    {
$newx=$x+sin($i)*$w;
$newy=$y+cos($i)*$h;
ImageLine($img,$newx,$newy,$oldx,$oldy,$color);
$oldx=$newx;
$oldy=$newy;
    }
}
verdy_p at wanadoo dot fr 
14年前
快速算法(“快20倍”)中的这些行存在一个小的编辑错误

imageLine( $img, $cx + $ix, $cy + $iy - 1, $cx + $ix, $cy + $ix, $fill );
imageLine( $img, $cx + $ix, $cy - $iy + 1, $cx + $ix, $cy - $ix, $fill );
imageLine( $img, $cx - $ix, $cy + $iy - 1, $cx - $ix, $cy + $ix, $fill );
imageLine( $img, $cx - $ix, $cy - $iy + 1, $cx - $ix, $cy - $ix, $fill );
imageLine( $img, $cx + $iy - 1, $cy + $ix, $cx + $ix, $cy + $ix, $fill );
imageLine( $img, $cx + $iy - 1, $cy - $ix, $cx + $ix, $cy - $ix, $fill );
imageLine( $img, $cx - $iy + 1, $cy + $ix, $cx - $ix, $cy + $ix, $fill );
imageLine( $img, $cx - $iy + 1, $cy - $ix, $cx - $ix, $cy - $ix, $fill );

每次调用参数中的“$ix”(就在“,$fill”参数之前)有时应该为“$iy”。

此算法使用 Bresenham 中点圆算法,但在第一卦限中增量计算连续像素位置($ix,$iy),相对于圆心($cx,$cy),然后通过交换或更改符号应用 8 个对称性。

椭圆存在类似的算法:当椭圆焦轴与两个图像轴对齐或正交时,它使用象限对称性而不是卦限对称性,方法是将每个象限细分为两个区域(由弧线上切线具有单位斜率的点限定)。

对于一般的椭圆(在平面上任意旋转),也有 4 个象限对称性,但计算起来稍微复杂一些,因为您需要计算旋转,因此您只能使用 2 个对称性,但增量算法仍然存在:您可能会认为这基于从两个焦点计算长度之和,这是恒定的;但是两个距离的和不能轻易平方(您需要计算两个距离的平方,然后在将它们相加并测试与精确长度的差异之前取它们的平方根。一个更简洁的解决方案使用 NURBS(非均匀有理 B 样条),因为它们在数值上是稳定的,并且计算速度仍然非常快(您只需要一些浮点数作为分隔每个象限的节点常数,然后使用椭圆的简单二次参数方程而不是隐式方程来计算,因为二次(多项式)方程的一阶和二阶导数很容易限定以获得所需的精度并减少不必要的像素绘图数量:这样的参数方程将以 1 到 4 个子像素距离的移动速度绘制弧线上的点,但在将象限细分为两个区域时,实际上只有 1 到 2 个子像素)。

或者,您也可以绘制一个双倍分辨率的抗锯齿“直线”椭圆,然后旋转抗锯齿图像,同时将其缩放到一半大小,并同时将其组合到目标:取决于实现(和使用的计算语言),它可能更快(但这可能需要更多内存用于 2 倍比例的中间图像)……
dsl101 
15年前
在尝试长时间努力获得体面的抗锯齿圆函数后,我最终放弃了并从头开始编写了一些内容。它非常非常简单——基本上检查封闭正方形中的每个像素,但结果产生了非常好的抗锯齿,并对笔划宽度、抗锯齿量和抗锯齿的紧密度进行了良好的控制。我相信它可以得到相当大的优化,但它对我正在做的事情来说足够快了。希望它对某些人有用。

<?php

function imagecircleaa($img, $cx, $cy, $r, $w, $s, $t, $color) // image, centerX, centerY, radius, stroke width, aa width, tightness, color
{
 $adj = $w + $s;
 $sCol = imagecolorallocate($img, $color['r'], $color['g'], $color['b']);
 for($x = -$r - $adj; $x <= $r + $adj; $x++)
 {
 for($y = -$r - $adj; $y <= $r + $adj; $y++)
 {
 $d = sqrt($x * $x + $y * $y); // distance from pixel to center
 $err = abs($d - $r); // absolute distance from pixel to circle edge
 if($err <= $w / 2 + $s) // within the stroke width + smoothing radius
 {
 if($err <= $w / 2) // inside the stroke width so make it solid color
 {
 $aaCol = $sCol;
 }
 else // in the antialisaing region so make it a blended color
 {
 $err -= $w / 2; // adjust to the aliased part
 $err = 1 - $err / $s; // adjust to between 0 and 1
 $err = ($err - 0.5) * $t * 2; // adjust to -$t to +$t for tightness
 $err = ($err / sqrt(1 + $err * $err) + 1) / 2; // sigmoid curve to smooth edges
 $rgb = imagecolorat($img, $x + $cx, $y + $cy); // Get current background color
 $rB = ($rgb >> 16) & 0xFF;
 $gB = ($rgb >> 8) & 0xFF;
 $bB = $rgb & 0xFF;
 $rDelta = ($rB - $color['r']); // change in Red from background
 $rComp = $rB - $rDelta * $err; // mix Red
 $gDelta = ($gB - $color['g']); // change in Red from background
 $gComp = $gB - $gDelta * $err; // mix Red
 $bDelta = ($bB - $color['b']); // change in Red from background
 $bComp = $bB - $bDelta * $err; // mix Red
 $aaCol = imagecolorallocate($img, $rComp, $gComp, $bComp);
 }
 imagesetpixel($img, $x + $cx, $y + $cy, $aaCol);
 }
 }
 }
}

$img = imagecreatetruecolor(500,500);

$cBlack = imagecolorallocate($img, 0, 0, 0);
$cGrey = imagecolorallocate($img, 120, 120, 120);
$cWhite = imagecolorallocate($img, 255, 255, 255);

imagefill($img, 0, 0, $cWhite);
imagepolygon($img, array(0, 0,200, 0, 200, 200, 0, 200), 4, cBlack);

$aWhite = array('r'=>255, 'g'=>255, 'b'=>255);
$aBlack = array('r'=>0, 'g'=>0, 'b'=>0);
$aRed = array('r'=>200, 'g'=>0, 'b'=>0);
$aGreen = array('r'=>0, 'g'=>200, 'b'=>0);
$aBlue = array('r'=>0, 'g'=>0, 'b'=>255);

// standard ellipse function for comparison
imageellipse($img, 100, 100, 50, 50, $cBlack);

// compare different tightnesses - good values are between 2 and 8
// note overall width is stroke width + 2 * aa width (e.g. 12 pixels below)
imagecircleaa($img, 50, 50, 25, 2, 5, 2, $aBlue);
imagecircleaa($img, 50, 150, 25, 2, 5, 8, $aBlue);

// different coloured background to show blending
imagefilledrectangle($img, 150,150, 200, 200, $cGrey);
imagecircleaa($img, 150, 150, 25, 3, 2, 2, $aRed);

// overlapping circles still aa nicely, although the colour blending algorithm produces quite dark intermediate shades
imagecircleaa($img, 150, 60, 25, 2, 3, 2, $aBlue);
imagecircleaa($img, 150, 50, 25, 2, 3, 2, $aGreen);

header("Content-type: image/png");
imagepng($img);
imagedestroy($img);
?>
klaas at kosmokrator dot com 
18年前
这是 sebbi 的抗锯齿圆函数的优化版本的优化版本:(速度提高 20 多倍)……

<?php

 function imageSmoothCircle( &$img, $cx, $cy, $cr, $color ) {
 $ir = $cr;
 $ix = 0;
 $iy = $ir;
 $ig = 2 * $ir - 3;
 $idgr = -6;
 $idgd = 4 * $ir - 10;
 $fill = imageColorExactAlpha( $img, $color[ 'R' ], $color[ 'G' ], $color[ 'B' ], 0 );
 imageLine( $img, $cx + $cr - 1, $cy, $cx, $cy, $fill );
 imageLine( $img, $cx - $cr + 1, $cy, $cx - 1, $cy, $fill );
 imageLine( $img, $cx, $cy + $cr - 1, $cx, $cy + 1, $fill );
 imageLine( $img, $cx, $cy - $cr + 1, $cx, $cy - 1, $fill );
 $draw = imageColorExactAlpha( $img, $color[ 'R' ], $color[ 'G' ], $color[ 'B' ], 42 );
 imageSetPixel( $img, $cx + $cr, $cy, $draw );
 imageSetPixel( $img, $cx - $cr, $cy, $draw );
 imageSetPixel( $img, $cx, $cy + $cr, $draw );
 imageSetPixel( $img, $cx, $cy - $cr, $draw );
 while ( $ix <= $iy - 2 ) {
 if ( $ig < 0 ) {
 $ig += $idgd;
 $idgd -= 8;
 $iy--;
 } else {
 $ig += $idgr;
 $idgd -= 4;
 }
 $idgr -= 4;
 $ix++;
 imageLine( $img, $cx + $ix, $cy + $iy - 1, $cx + $ix, $cy + $ix, $fill );
 imageLine( $img, $cx + $ix, $cy - $iy + 1, $cx + $ix, $cy - $ix, $fill );
 imageLine( $img, $cx - $ix, $cy + $iy - 1, $cx - $ix, $cy + $ix, $fill );
 imageLine( $img, $cx - $ix, $cy - $iy + 1, $cx - $ix, $cy - $ix, $fill );
 imageLine( $img, $cx + $iy - 1, $cy + $ix, $cx + $ix, $cy + $ix, $fill );
 imageLine( $img, $cx + $iy - 1, $cy - $ix, $cx + $ix, $cy - $ix, $fill );
 imageLine( $img, $cx - $iy + 1, $cy + $ix, $cx - $ix, $cy + $ix, $fill );
 imageLine( $img, $cx - $iy + 1, $cy - $ix, $cx - $ix, $cy - $ix, $fill );
 $filled = 0;
 for ( $xx = $ix - 0.45; $xx < $ix + 0.5; $xx += 0.2 ) {
 for ( $yy = $iy - 0.45; $yy < $iy + 0.5; $yy += 0.2 ) {
 if ( sqrt( pow( $xx, 2 ) + pow( $yy, 2 ) ) < $cr ) $filled += 4;
 }
 }
 $draw = imageColorExactAlpha( $img, $color[ 'R' ], $color[ 'G' ], $color[ 'B' ], ( 100 - $filled ) );
 imageSetPixel( $img, $cx + $ix, $cy + $iy, $draw );
 imageSetPixel( $img, $cx + $ix, $cy - $iy, $draw );
 imageSetPixel( $img, $cx - $ix, $cy + $iy, $draw );
 imageSetPixel( $img, $cx - $ix, $cy - $iy, $draw );
 imageSetPixel( $img, $cx + $iy, $cy + $ix, $draw );
 imageSetPixel( $img, $cx + $iy, $cy - $ix, $draw );
 imageSetPixel( $img, $cx - $iy, $cy + $ix, $draw );
 imageSetPixel( $img, $cx - $iy, $cy - $ix, $draw );
 }
 }

 $img = imageCreateTrueColor( 320, 240 );

 imageSmoothCircle( $img, 160, 120, 100, array( 'R' => 0xCC, 'G' => 0x33, 'B' => 0x00 ) );
 imageSmoothCircle( $img, 170, 110, 75, array( 'R' => 0xDD, 'G' => 0x66, 'B' => 0x00 ) );
 imageSmoothCircle( $img, 180, 100, 50, array( 'R' => 0xEE, 'G' => 0x99, 'B' => 0x00 ) );
 imageSmoothCircle( $img, 190, 90, 25, array( 'R' => 0xFF, 'G' => 0xCC, 'B' => 0x00 ) );

 header( 'Content-Type: image/png' );
 imagePNG( $img );

?>
sebbi at conceptT dot com 
19年前
我在谷歌上搜索并获得了以下网址
http://www.isocalc.com/tutorials/antialias.htm
通过本教程,我能够编写一个函数将此算法转换为 php,填充圆的结果如下
<?php
function imagefilledcircleantialiased(&$im, $cx, $cy, $r, $fgcolor, $bgcolor) {
 $fgcolors = imagecolorsforindex($im,$fgcolor);
 $bgcolors = imagecolorsforindex($im,$bgcolor);
 for ( $x = $cx - $r; $x <= $cx + $r; $x++ ) {
 for ( $y = $cy - $r; $y <= $cy + $r; $y++ ) {
 $rx = $x - $cx; $ry = $y - $cy;
 $ir = sqrt(( $rx == 0 ? 0 : pow($rx - 0.5*abs($rx)/$rx, 2) ) + ( $ry == 0 ? 0 : pow($ry - 0.5*abs($ry)/$ry, 2) ));
 $or = sqrt(( $rx == 0 ? 0 : pow($rx + 0.5*abs($rx)/$rx, 2) ) + ( $ry == 0 ? 0 : pow($ry + 0.5*abs($ry)/$ry, 2) ));
 if ( $or <= $r ) {
 imagesetpixel($im, $x, $y, $fgcolor);
 }
 elseif ( $ir < $r ) {
 $filled = 0;
 for ( $xx = $x - 0.45; $xx < $x + 0.5; $xx+=0.1 ) {
 for ( $yy = $y - 0.45; $yy < $y + 0.5; $yy+=0.1 ) {
 $rxx = $xx - $cx; $ryy = $yy - $cy;
 if ( sqrt(pow($rxx, 2) + pow($ryy, 2)) < $r ) $filled++;
 }
 }
 $red = round($bgcolors['red'] + ( $fgcolors['red'] - $bgcolors['red'] ) * $filled / 100);
 $green = round($bgcolors['green'] + ( $fgcolors['green'] - $bgcolors['green'] ) * $filled / 100);
 $blue = round($bgcolors['blue'] + ( $fgcolors['blue'] - $bgcolors['blue'] ) * $filled / 100);
 imagesetpixel($im, $x, $y, imagecolorclosest($im, $red, $green, $blue));
 }
 }
 }
}

$width = 160;
$height = 200;
$r = 20;
$bgc = "651713";
$fgc = "b12b2c";

$im = imagecreate($width, $height);
$bgcolor = imagecolorallocate($im, hexdec(substr($bgc, 0, 2)), hexdec(substr($bgc, 2, 2)), hexdec(substr($bgc, 4, 2)));
for( $i = 0; $i < 100; $i++ ) {
 imagecolorallocate($im, ( hexdec(substr($fgc, 0, 2)) + $i*hexdec(substr($bgc, 0, 2))) / ($i + 1), ( hexdec(substr($fgc, 2, 2)) + $i*hexdec(substr($bgc, 2, 2))) / ($i + 1), ( hexdec(substr($fgc, 4, 2)) + $i*hexdec(substr($bgc, 4, 2))) / ($i + 1));
}
$fgcolor = imagecolorclosest($im, hexdec(substr($fgc, 0, 2)), hexdec(substr($fgc, 2, 2)), hexdec(substr($fgc, 4, 2)));

imagefilledcircleantialiased($im, 80, 100, $r, $fgcolor, $bgcolor);

header("Content-Type: image/png");
imagepng($im);
?>
An improvement would be to draw the inner rectangle or more rectangles in the circle with the builtin rectangle function to reduce the usage of imagesetpixel() from (2*r)^2 to 2*Pi*(r + epsilon), in other words, the dependency on r would break down from square to linear.
另一个改进是确定观察到的像素中的填充和未填充三角形并计算它们的面积,这样我们就可以摆脱用于获取填充/未填充分数的内循环。
可以很容易地修改此函数来解决其他问题,例如线、未填充圆等。
voinic at NOSgmailPAM dot com 
18年前
我发现绘制抗锯齿多边形并保持其透明的唯一技巧(例如在谷歌地图中用作叠加层)……制作两张图像并将它们合并。操作顺序很重要,最终图像的透明颜色必须在合并后设置

<?
header("Content-type: image/png");

$values = array(
40, 50, // 点 1 (x, y)
20, 240, // 点 2 (x, y)
60, 60, // 点 3 (x, y)
240, 20, // 点 4 (x, y)
50, 40, // 点 5 (x, y)
10, 10 // 点 6 (x, y)
           );

$im = imagecreate(250, 250);
$bg = imagecolorallocate($im, 255, 255, 255);

$im2 = imagecreatetruecolor(250, 250);
$bg2 = imagecolorallocate($im2, 255, 255, 255);
imagefilledrectangle($im2,0,0,249,249,$bg2);
imagecolortransparent($im2, $bg);
imageantialias($im2, true);
$c_red = imagecolorallocate($im2, 255, 0, 0);
imagepolygon($im2, $values, 6, $c_red);
imageantialias($im2, false);

imagecopymerge($im, $im2,0,0,0,0,250,250,50);

imagecolortransparent($im, $bg);
$c_red_alpha = imagecolorallocatealpha($im, 255, 0, 0, 60);
imagefilledpolygon($im, $values, 6, $c_red_alpha);

imagepng($im);
imagedestroy($im);
imagedestroy($im2);
?>